To view the status and details of all your support tickets, follow these simple steps:
Go to the client portal homepage: Start by navigating to the client portal homepage.
Log in to your account: You must log in with your email and password to access your tickets. You won’t be able to see the 'Ticket' page unless you’re logged in.
Click on the ‘Tickets’ page: Once logged in, you'll find the Tickets page in the top-right corner of the portal. Click on it to open the page where all your tickets are listed. Here, you’ll find a full list of tickets you’ve raised or that we’ve created on your behalf.
What can you see and do on the main tickets list page?
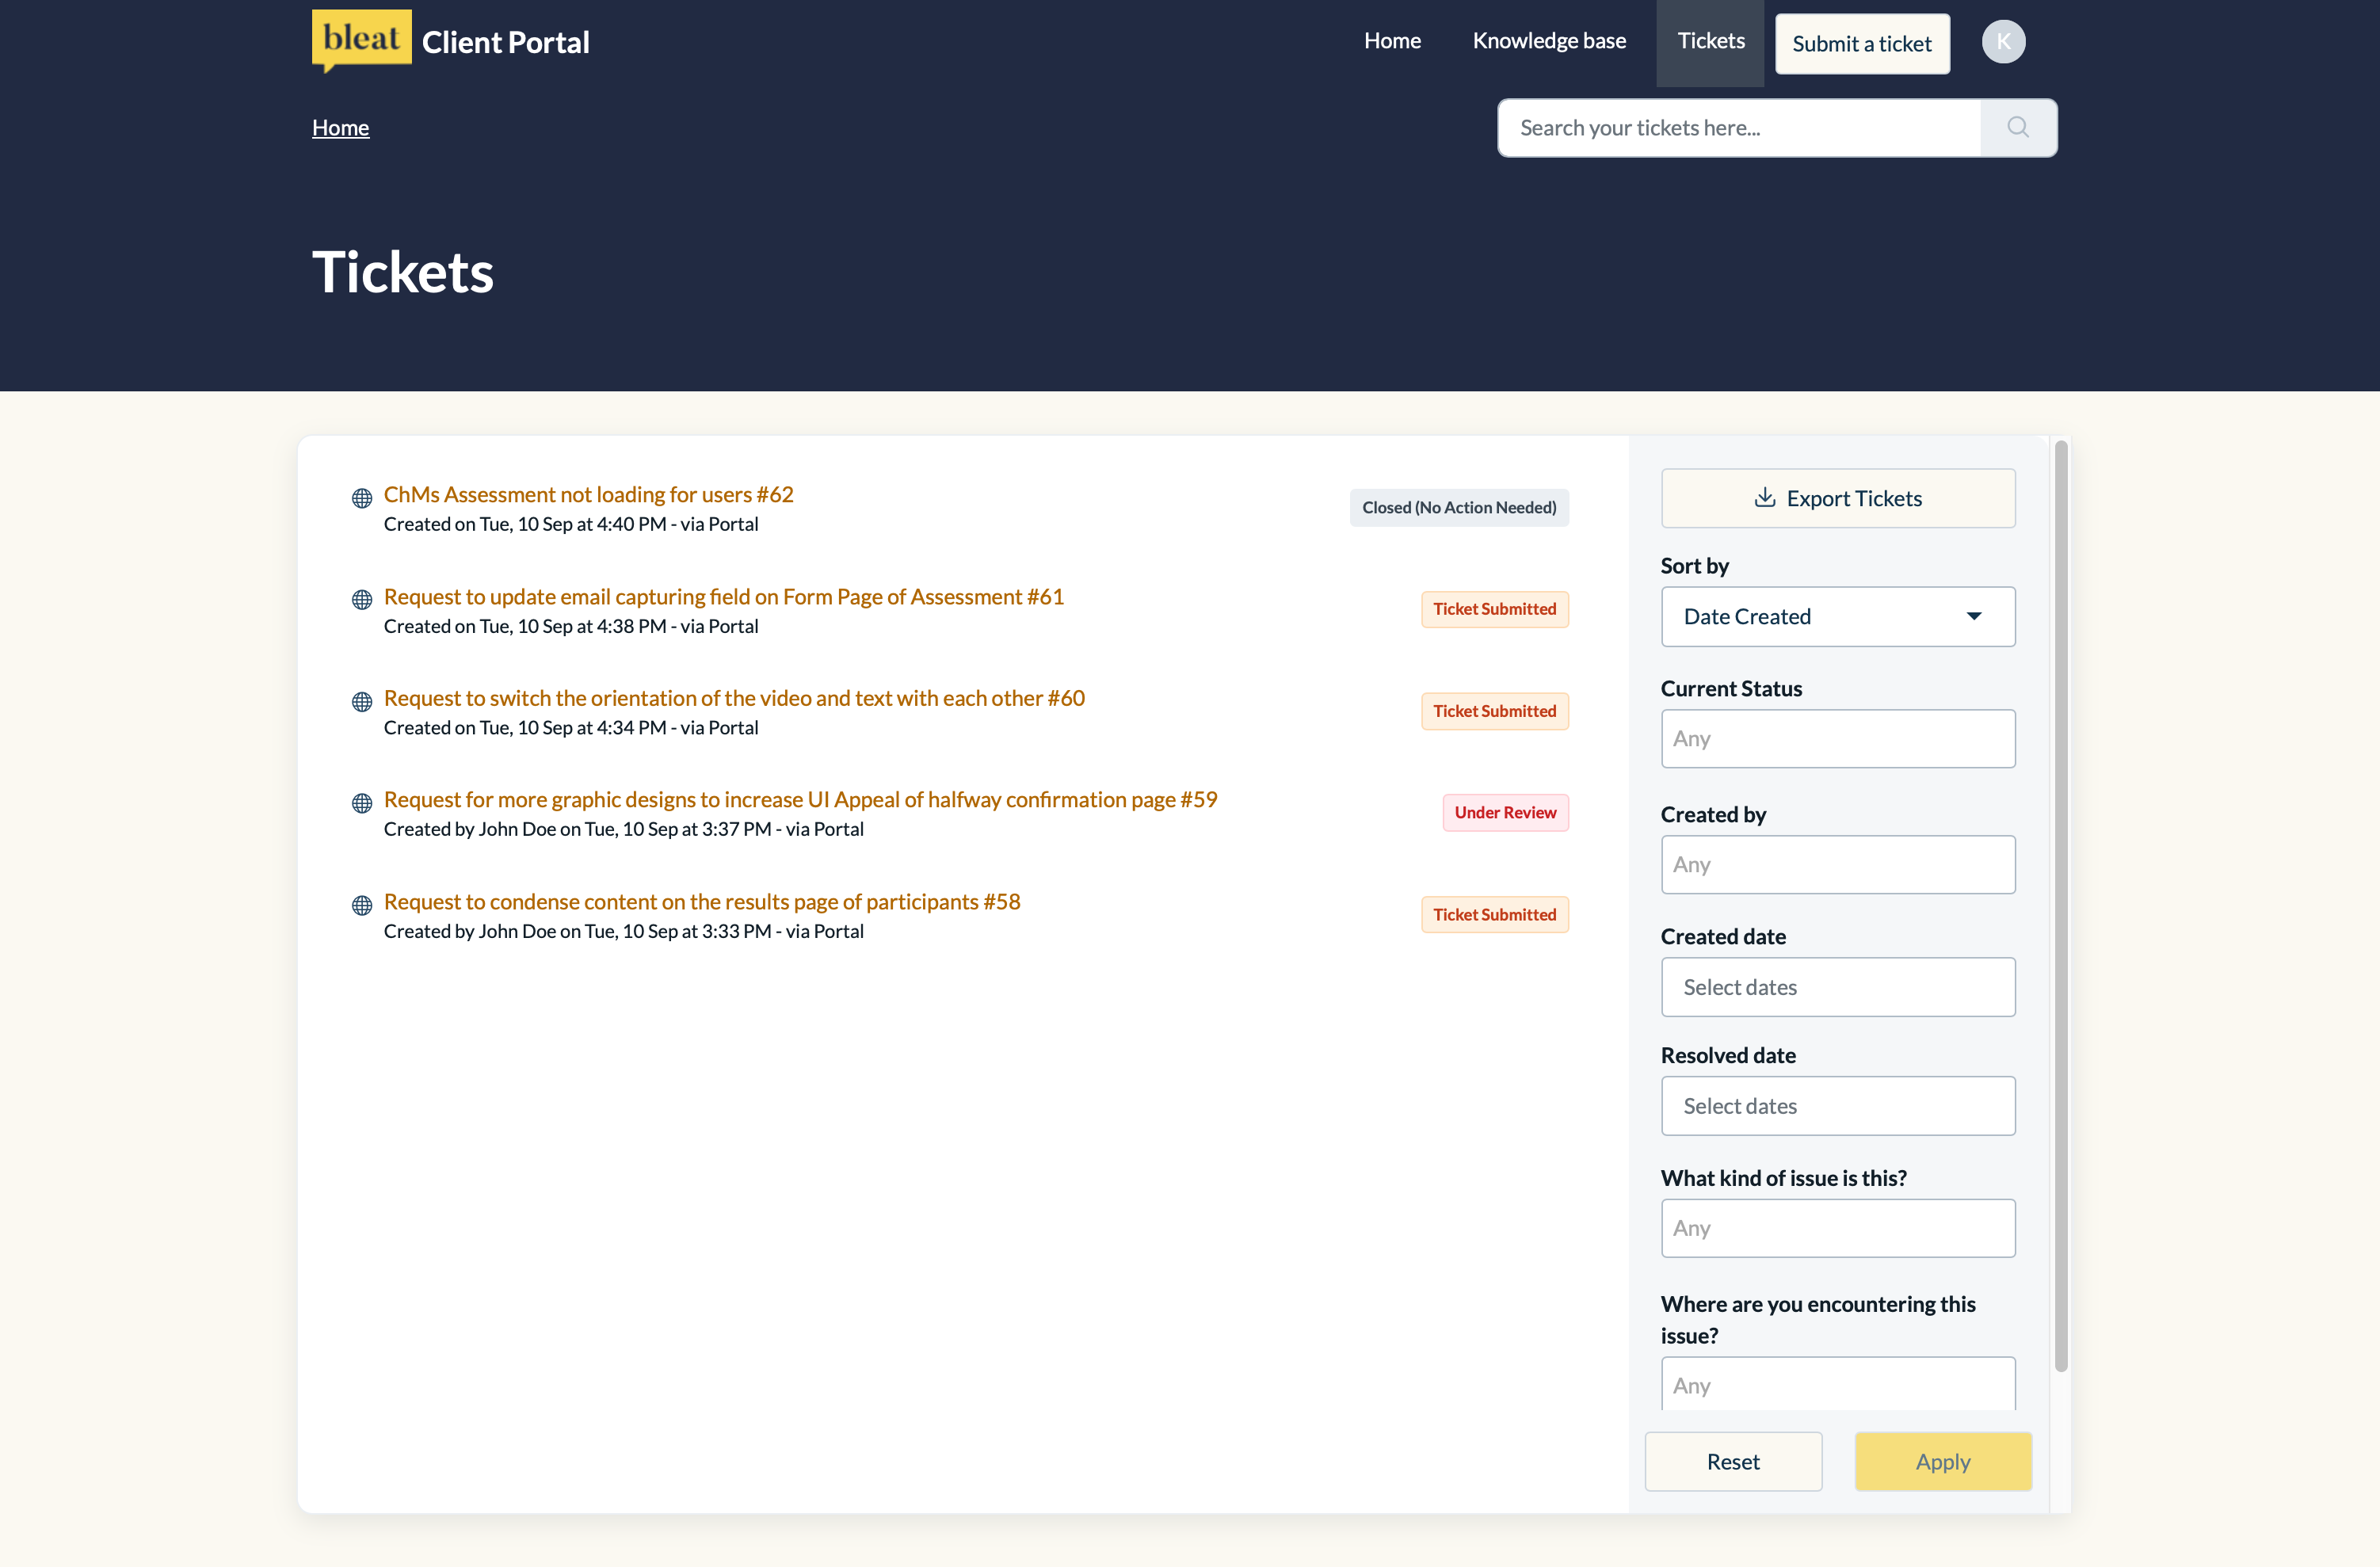
Ticket titles: Each ticket is labeled with the subject line that was entered when the ticket was first submitted. This gives you a quick summary of what the ticket is about.
Creation date: Below each ticket title, you’ll see the date the ticket was created, making it easier to track when the issue was first raised.
Ticket status: On the right side of each ticket, you’ll notice colored boxes that indicate the current status of the ticket. Here’s what the statuses mean:
Ticket Submitted: This is the default status when a ticket is first submitted.
Under Review: When our team starts working on your ticket, the status changes to this.
Awaiting your Reply: If we need more information or a response from you, we update the status to this.
Resolved: Once your concern has been addressed and the issue is fixed, the ticket moves to this status.
Closed (No Action Needed): If the ticket resolves itself or no action is needed from our team, or if you close the ticket yourself, it will move to this status.
On Hold: This status appears if the ticket is delayed, either at your request or due to an issue from our side.
Other company members’ tickets: You can also see tickets raised by other members of your organization, with a note that says created by [team member’s name] under the ticket title.
Filter tickets: On the right-hand side, you’ll find filters that allow you to search for specific tickets. You can filter by fields such as ticket status, creation date, or other relevant details.
Export tickets: If you need to export your ticket list, click the Export Tickets button at the top of the filters list. You can choose which fields to include and export the file in CSV or Excel format.
Individual ticket view
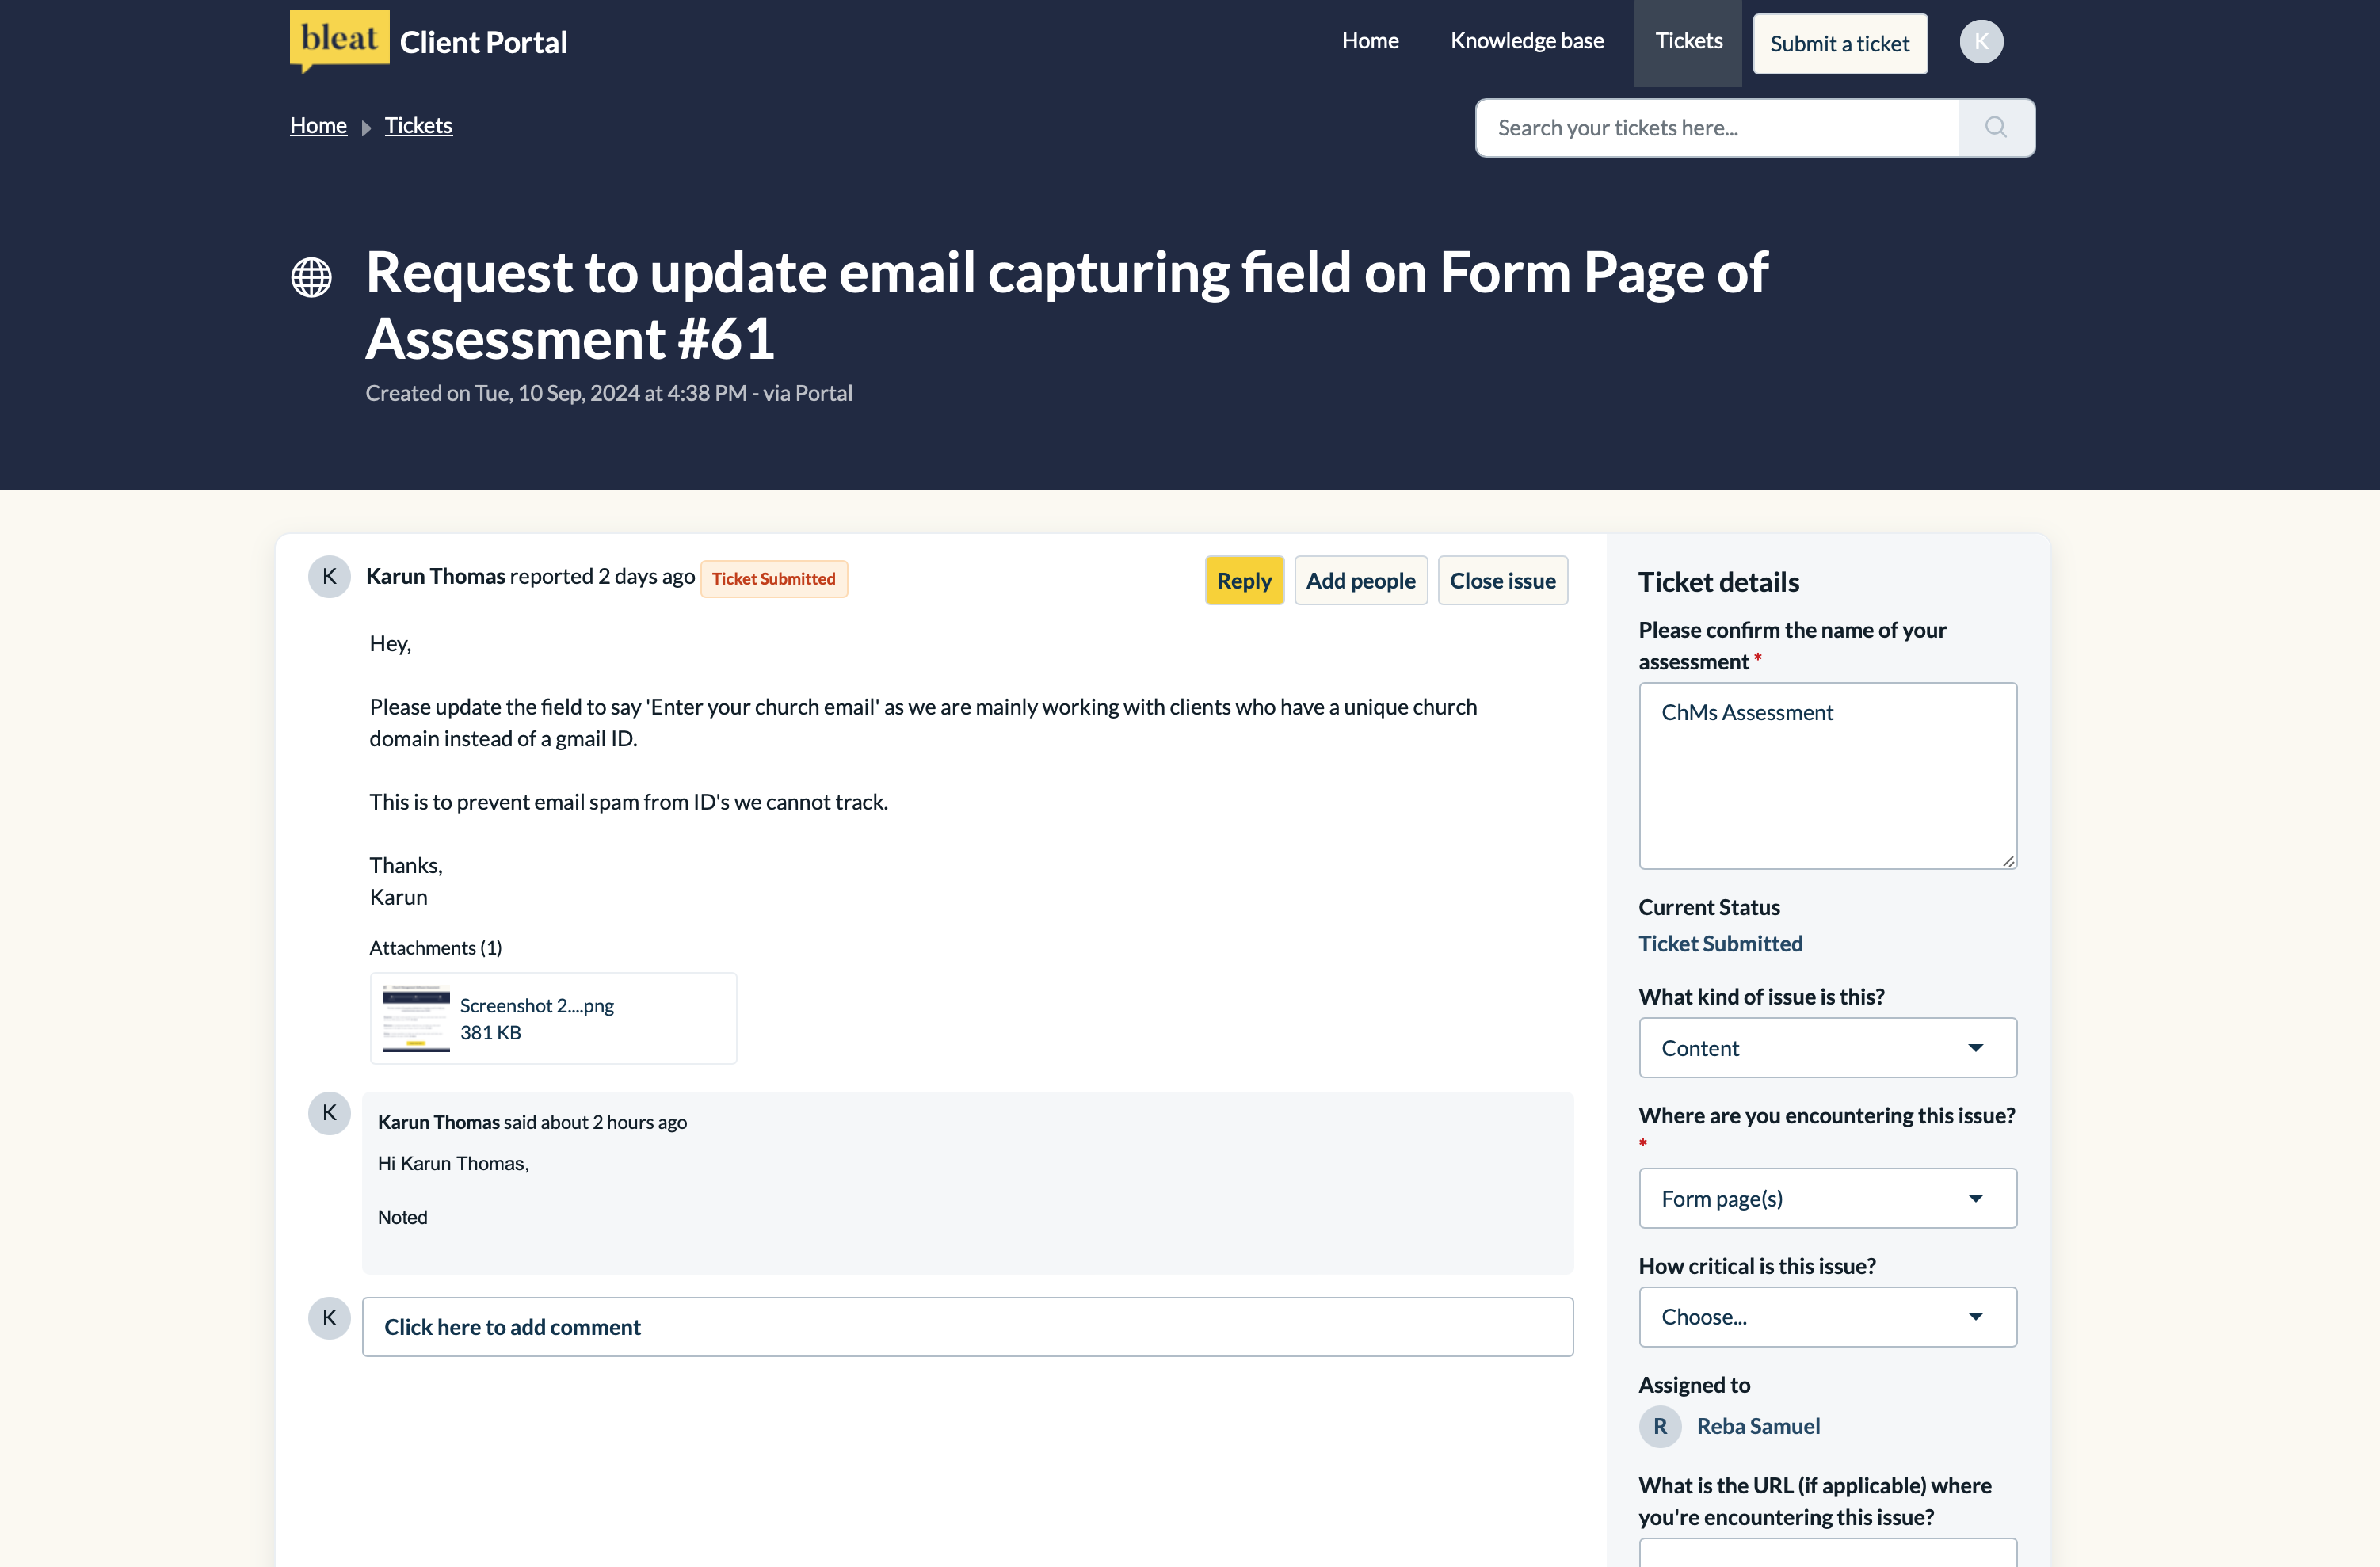
When you click on any ticket from the main list, it will open the Individual Ticket View, where you can see more details and take further action.
View all communications: You’ll be able to see all the communication and updates related to the ticket, including replies from our team or comments that you or the other people you CC'd have made.
Reply or add a comment: If you need to provide more information, click the 'Reply' button (yellow) or scroll to the bottom to add your reply in the 'Click here to add comment' box. You can also attach files, such as screenshots or documents, to help explain the issue.
Add people to CC: Need to keep others updated? Click the 'Add people' button next to the reply option, and add their email addresses to CC them on the ticket.
Close the ticket: If the issue has been resolved and you no longer need our help, you can close the ticket from your side. Click the 'Close issue' button to finalize the process.
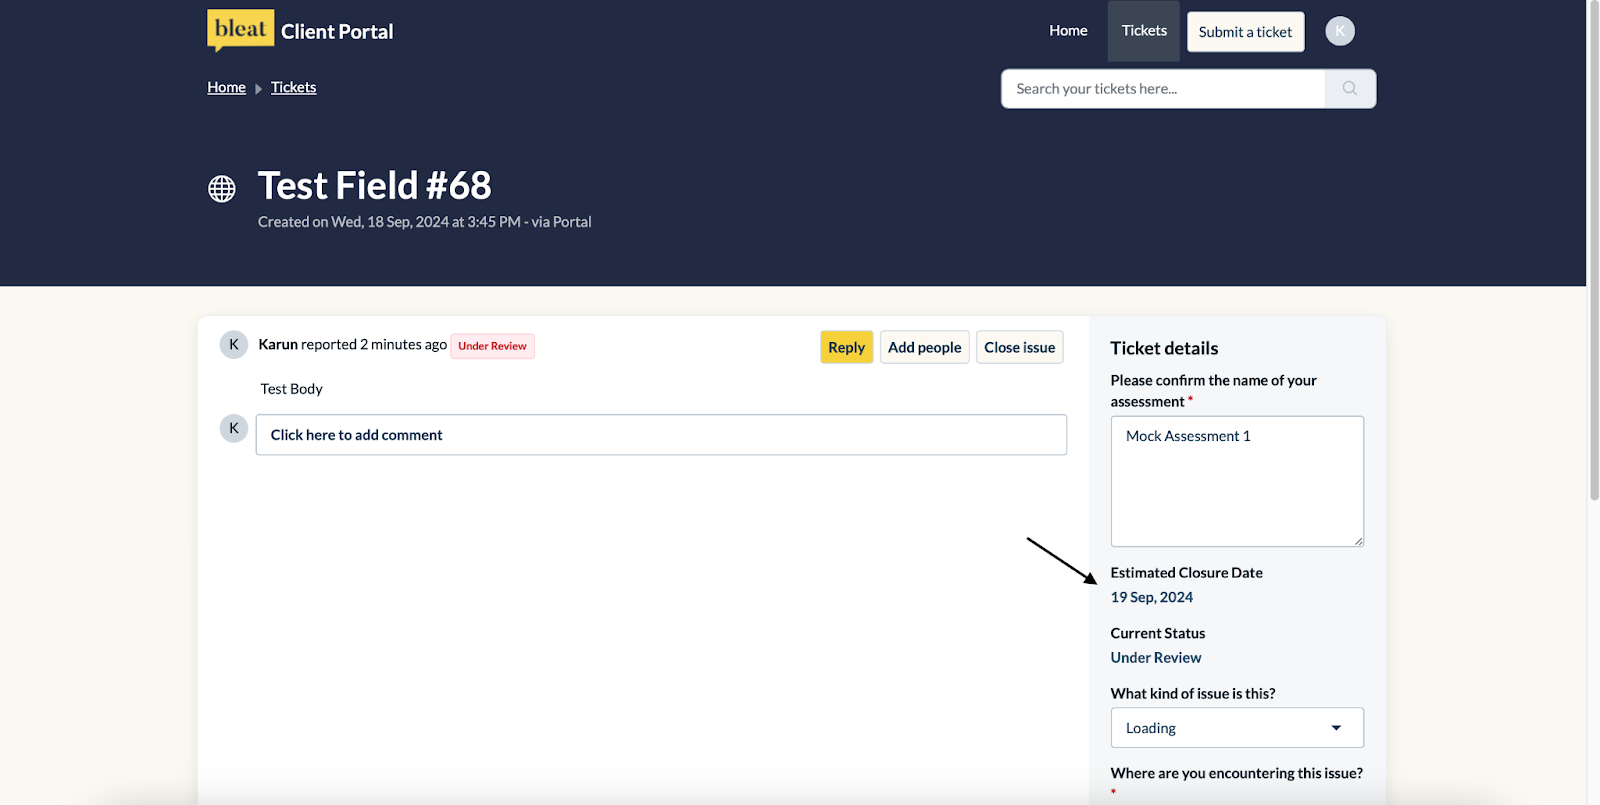
Ticket fields (Editable): You can update some of the white fields on the right-hand side of the page if you need to modify the context of the ticket. You’ll also be able to view the estimated closure date once we update it from our side (As seen below).
By following these steps, you can easily manage and monitor all your tickets in the client portal. If you need further assistance, don’t hesitate to reach out!
Was this article helpful?
That’s Great!
Thank you for your feedback
Sorry! We couldn't be helpful
Thank you for your feedback
Feedback sent
We appreciate your effort and will try to fix the article